Quick guide to understanding your cameras autofocus points
(Republished in 11/2022, originally written in 2017)
When you start out with photography, it’s very likely that you come home from a trip to the field just to find out that none or just a few of your images are sharp. The good news is that this is nothing to worry about. It happens to the most of us in the beginning. A very common reason for this is the lack of understanding of your cameras autofocus system.
My first camera had only nine autofocus points to choose from while my current camera has 65 points. Some models have even more than 400 points, which shows you a great development and difference in autofocus systems. These numbers will give you a good sense of how complex the topic is and how important it is to really understand it.
For that reason, I’ve created an autofocus points quick guide. It’ll give you an overview of the difference between the available area selection modes and when to use certain options. This is only a part of the whole autofocus system. Other parts such as autofocus modes will be covered in a separate article.
Availability of Autofocus Points
As a Canon user, I will explain certain things by using examples of a Canon camera. While I am trying to stay as neutral as possible I will need to use some brand-specific terminology every now and then.
To assist with my research for this article, I’ve downloaded manuals and guides of other manufacturers about the topic to get to know possible differences between the brands. You will be able to find most settings and modes with the same or similar names across the most common brands. It shouldn’t be difficult to utilize the given information for brands like Nikon, Sony, etc. Even within the Canon range some settings and functionalities are only available in the higher priced section.
With that being said, let’s have a look at the different autofocus area selection modes (autofocus will be abbreviated with AF in the following).
Automatic AF point selection
Automatic AF point selection(all available points are active)
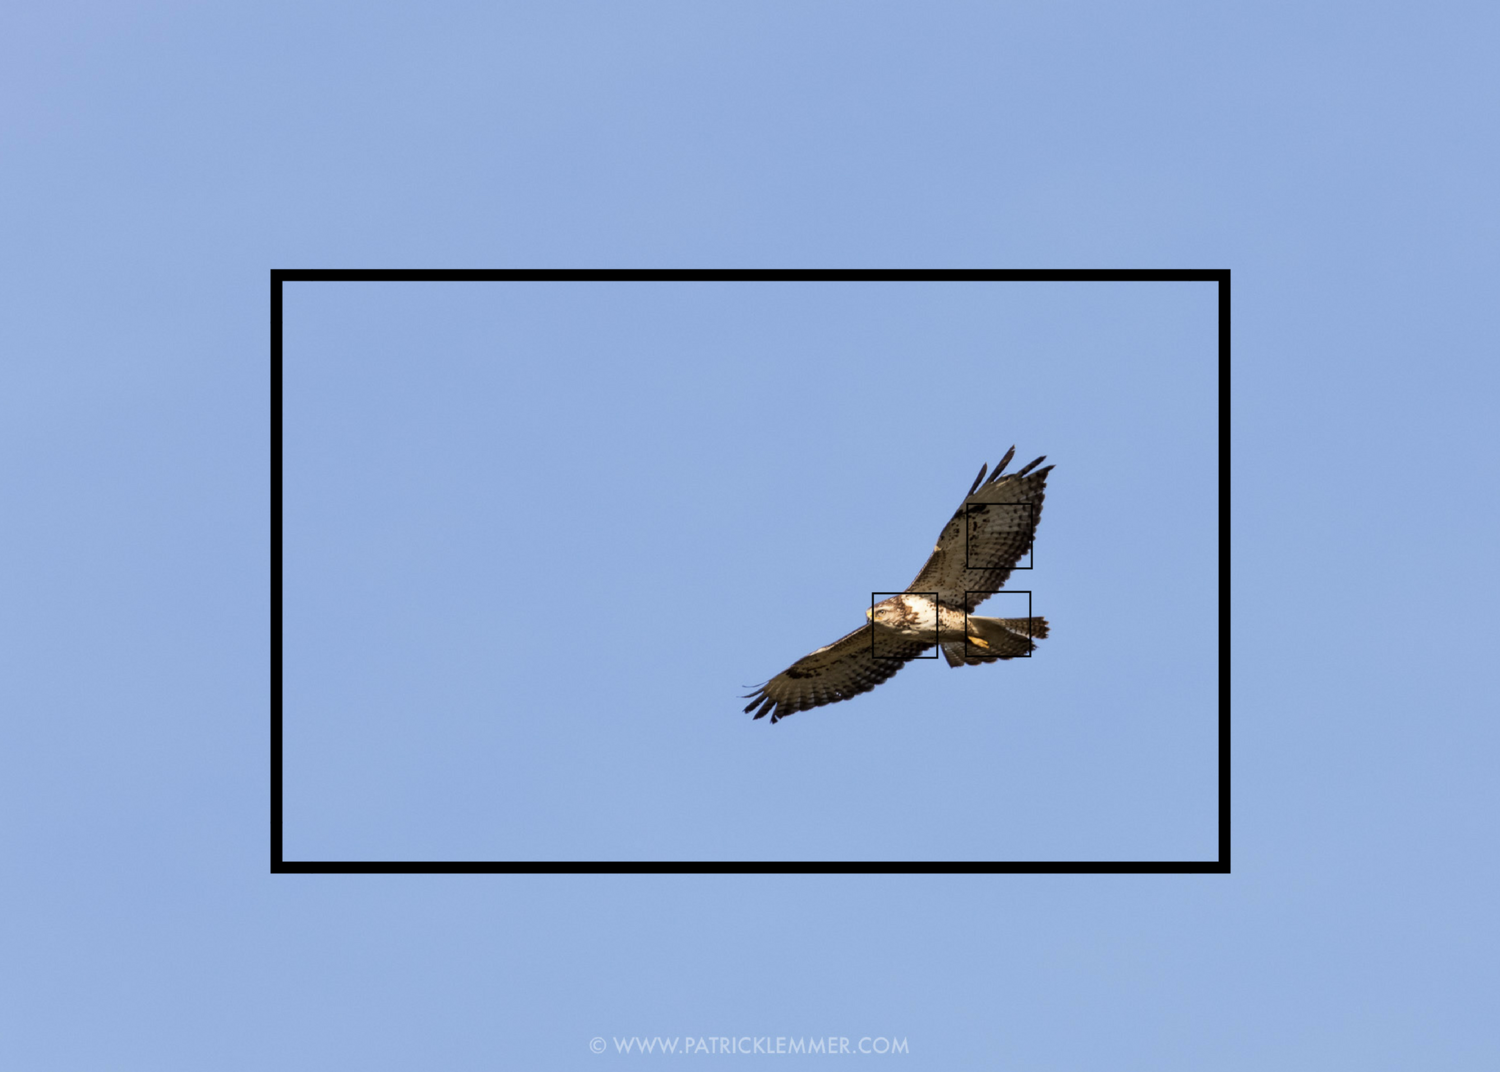
Probably the most common and well-known setting, since it is used in most cameras ‘’Automatic mode’’. If you switch on your camera for the first time, you’ll be presented with this Automatic autofocus point selection in your viewfinder. As you can see in the picture above, you have a frame within your display. This frame is placed around all available AF points of your camera. Whatever you want your camera to focus on must be inside this frame.
Your camera has ‘’x’’ number of single AF points. These points are all inside this frame, but only visible once you give your camera instructions to focus on a subject by pressing the shutter button half-way. The following is important in order to understand when to use this option and why it might not be the most popular option.
In Automatic AF point selection, your camera automatically picks a focus point for you, based on what’s in the frame. But it doesn’t just pick up any random focus point. It will always pick the subject or part of a subject closest to the camera with enough detail/contrast. In other words, the camera doesn’t know what you want to be in focus and therefore chooses the focal point based on what it can “find” first.
Generally, all AF points are of equal value and sometimes you can define a “main” point from which the camera starts tracking.
Using this option only really makes sense, if your subject is the closest thing to your camera with enough contrast/detail. As soon as there are distracting items in the foreground your camera will fail focusing on the intended subject.
Here is an image where you could use the Automatic AF point selection, since the buzzard is the only subject inside the frame and nothing can distract the cameras focal point.
The buzzard is the only subject in the frame and your autofocus can’t get distracted by anything else. It sets the points on the first and in this case only subject with enough detail. This is a situation where automatic AF point selection could work well. (Frame and focus points will look different in your viewfinder, this is just a demonstration of what this could look like.)
Zone AF & Large Zone AF
Zone AF
Large Zone AF
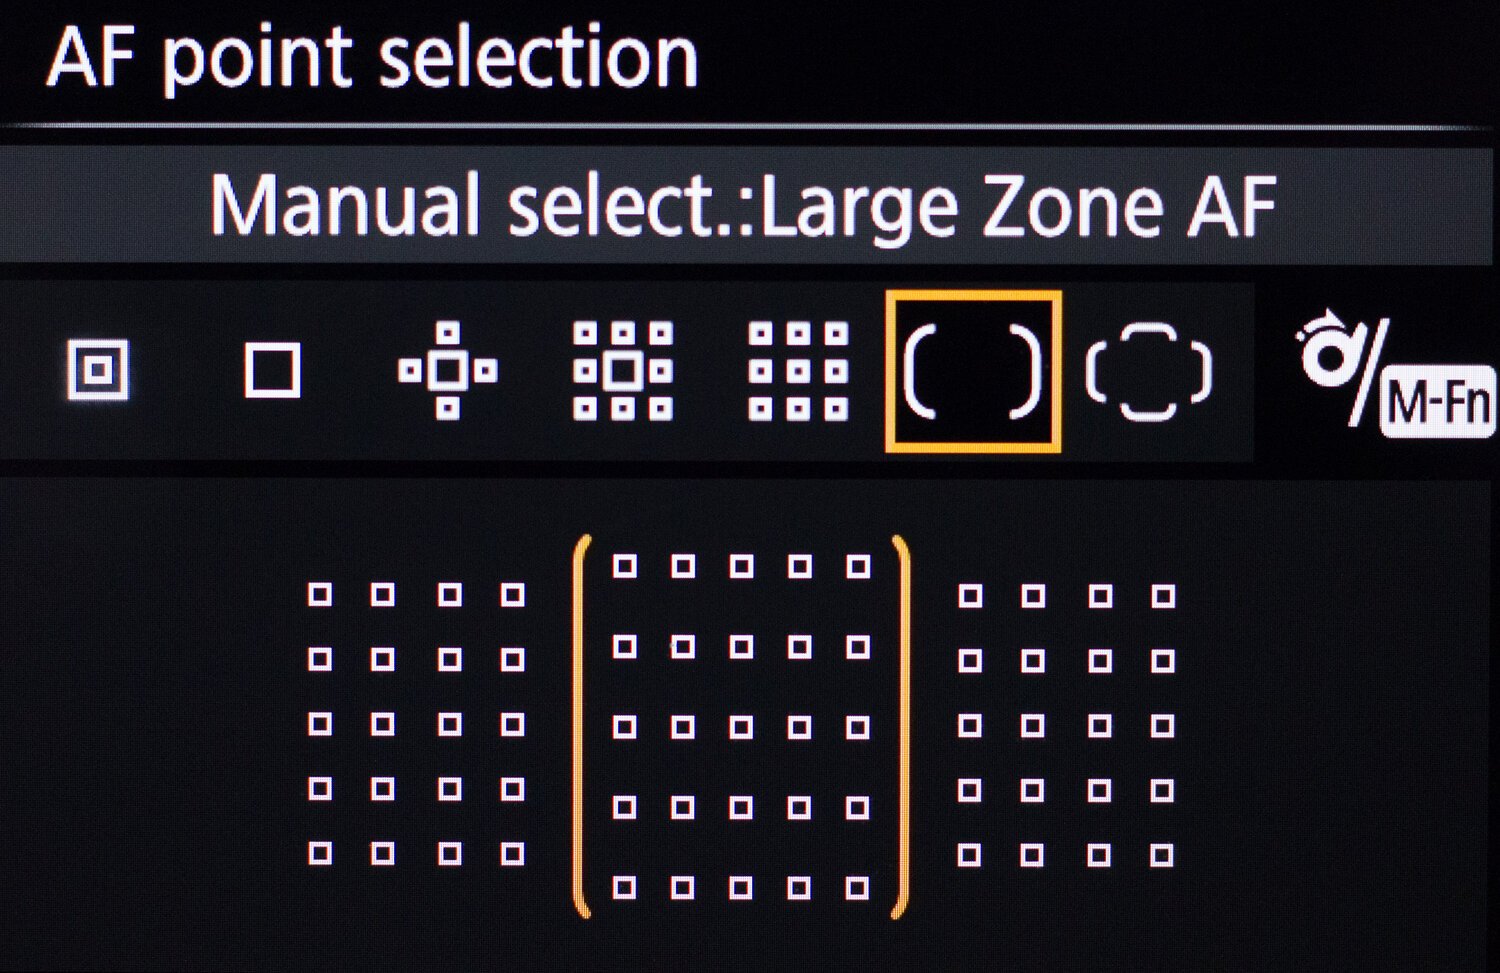
In this mode, you narrow down the area of available AF points a bit. Availability of both Zone AF options depends on your camera model and how many AF points are available in total. Usually, cameras with a smaller number of AF points only have one of the two modes.
Large Zone AF lets you choose from three blocks (left, middle, right). With Zone AF you can define the area within the blocks a bit more by going up or down.
From a functionality point of view, Zone AF works just like Automatic AF points selection. All single points are of equal value. The closest subject or part of a subject to the camera will be sharp. The smaller frame of the Zone modes allows you to keep unimportant parts out of focus without having to use the single point AF which concentrates on a very small portion of your composition only.
You can see the zone AF placed on the bird. Nothing could have distracted the focus in the foreground, the goose was the closest subject inside the frame.
AF point expansion
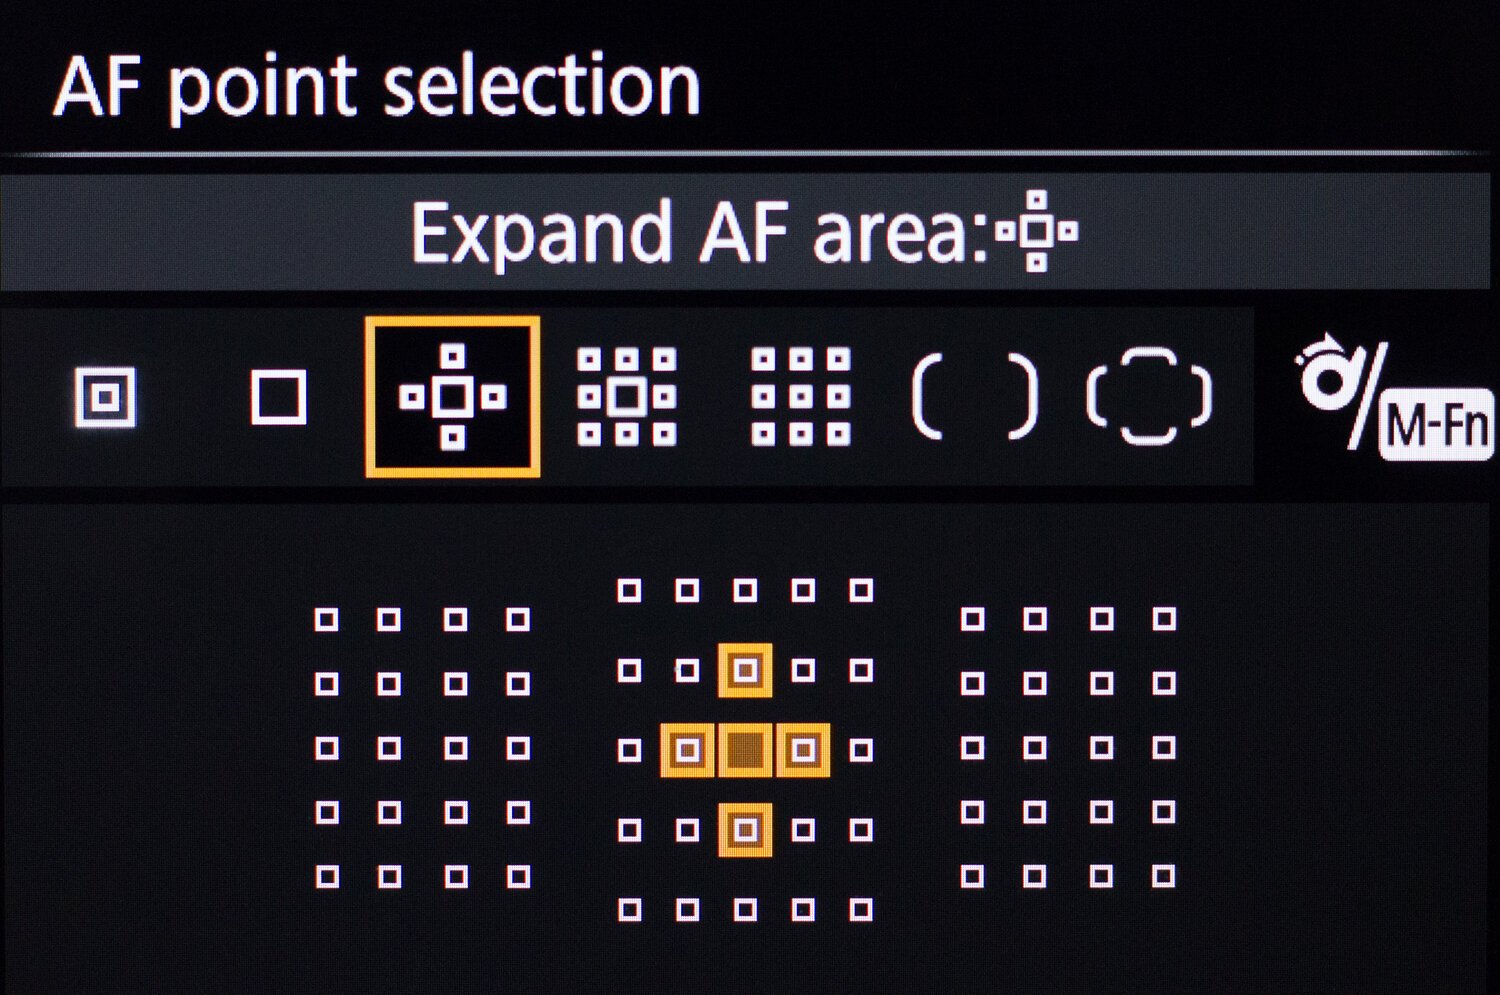
One main point with eight assisting points (full “circle” around the main point).
One main point with four assisting points (left, right, below and above the main point).
The closer we get to the single spot AF’s, the more control we have of pinpointing a very small part of the composition. If that’s what you are after, then I believe the AF point expansion is a great compromise. While you do have one main single point, many (but not all) cameras let you choose between some assistance for the main point. In this case, you have four or eight assisting points that increase the coverage of the AF field.
Picture this: a leopard is walking straight towards you on a sandy road from quite a distance. He isn’t fast, and you know he’ll most likely stay on the road for a while. In that case, AF point expansion would be a great option. You use the main point, move it across the AF field as needed for the right composition and “lock” it on the leopard’s face (or whatever spot you want in focus). As long as the cat isn’t changing pace and direction too much, you’ll be able to retain focus on the main point. If the leopard happens to move sidewards, your assisting points to the left and the right of the main point will start working. The animal stays in focus until you can correct it by moving the main point over the point you want to be in focus again.
The point expansion always makes sense when you want a great amount of control over the precise area that should be in focus, but you want a little assistance in form of surrounding points just in case the subject moves a bit too fast and leaves the main point. Another good use is bigger birds in flight. Compared to the Zone AF’s it allows you to focus on smaller areas like the eyes of the bird. You still have assistance in case the bird moves left, right, up or down a bit too fast.
This is probably one of the most used options as it lets you choose very defined portions of the composition to be in focus. At the same time, it increases odds of getting a sharp subject by falling back on surrounding points if the main point loses detail.
Notice the main point which is placed on the foxes eye. The animal was moving its face every now and then. That’s why I decided to use the point expansion AF to keep the head sharp. In case of movement the assisting points would have helped me out.
Spot AF
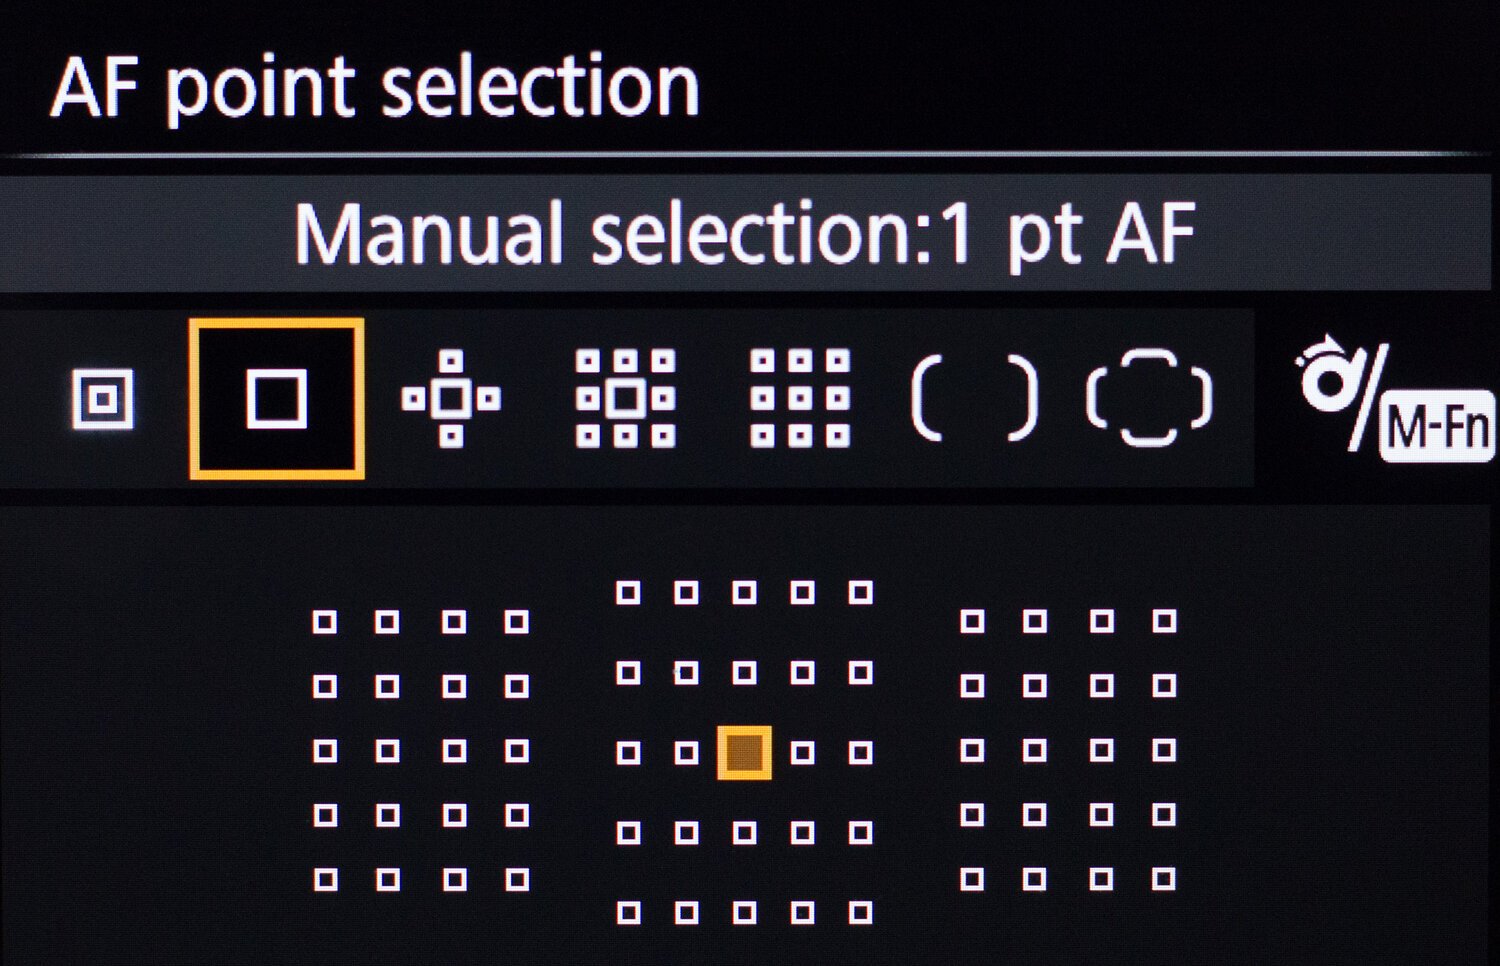
Only one single point selected.
One single point with an even smaller point inside for the most accurate focus on a certain spot.
Spot AF’s are the smallest AF point option you can choose from. With this single spot, you can carefully place sharp focus on one part of a scene/subject e.g. the eyes of an animal.
You only have one spot available which covers a very small portion of the composition. Therefore, this option makes the most sense if your subject isn’t moving (e.g. stationary animal, close-ups, landscapes, etc.). It’s most effective when you can take your time placing focus on the subject.
As you can see on the images above, there are two spot AF’s available. Single spot AF gives you one single spot to work with. Single point spot AF defines this spot by adding an even smaller point inside this spot.
A scenario in which this will work really well is a bird in a tree. More often than not birds sit on a branch with something in the foreground that would distract any of the bigger AF fields. With the spot AF’s you are able to precisely aim through the foreground objects and lock focus on the bird.
I carefully placed the single point spot AF on the birds eye. That way I could get it sharp, even though it sat behind some leafs and branches. (The focus point in this image has been enlarged for demonstration purposes.)
Conclusion
Depending on what camera you own, you’ll have to choose between quite a few options in terms of autofocus points. You’ll need to make sure you use the right one in every situation. For that reason, it is very important to know how each of them work and when they work best.
A general rule of thumb is to use the smallest point you can handle without sacrificing sharpness.
By customizing your camera settings, you can create a pretty effective setup for your autofocus in connection with back button focus. Never heard of back button focus? No worries. I will show you how that works in one of the next articles so make sure you don’t miss it.
Until next time,
Pat


